RedmineStudio Setting Up Review Trackers
redminepower
RedminePower

Coming Soon… >>
This is the fourth part of the RedmineStudio settings guide.
The settings guide is organized by tabs in the settings screen.
This article covers the following settings:
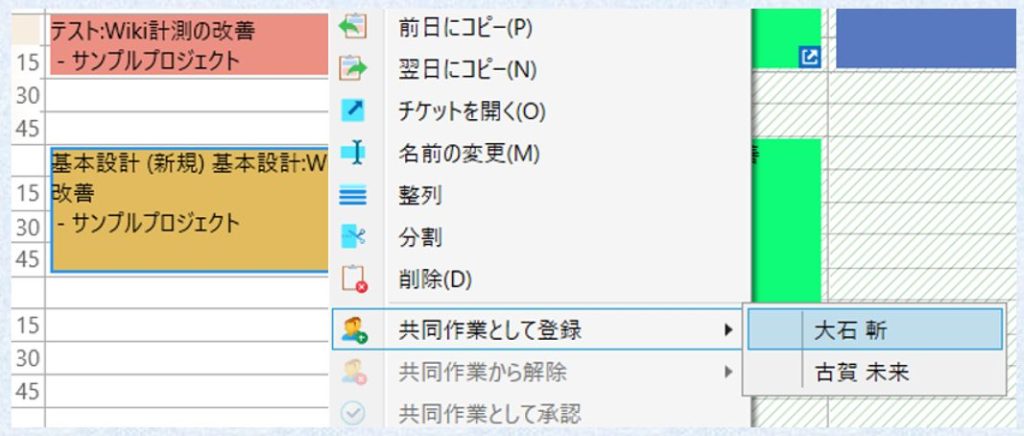
Select additional users you want to display on the input screen.
To enable this setting, “System Administrator’s API Access Key” in “General” must be configured.
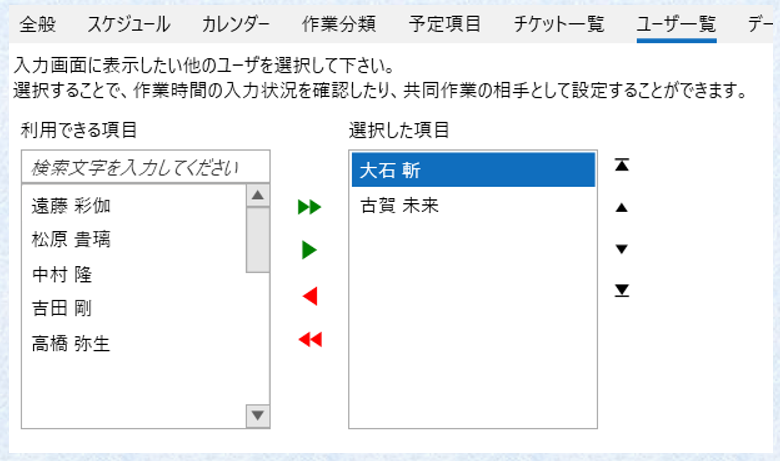
Users selected here are displayed on the input screen as shown below. This allows you to check the status of time entry input and set them as “Collaboration” partners.

“Collaboration” is a feature that pre-registers work done together, such as meetings or face-to-face reviews, to reduce the effort of entering work time for the other party. The other party only needs to approve, and the work time will be registered according to the set issue and activity category. Of course, they can also cancel the registration and enter it themselves.
RedmineStudio can output work records for the selected date in CSV format. This setting configures the CSV output format and settings for launching external tools using it. By configuring these settings, you can integrate not only with Redmine but also with other tools such as your company’s attendance management system.
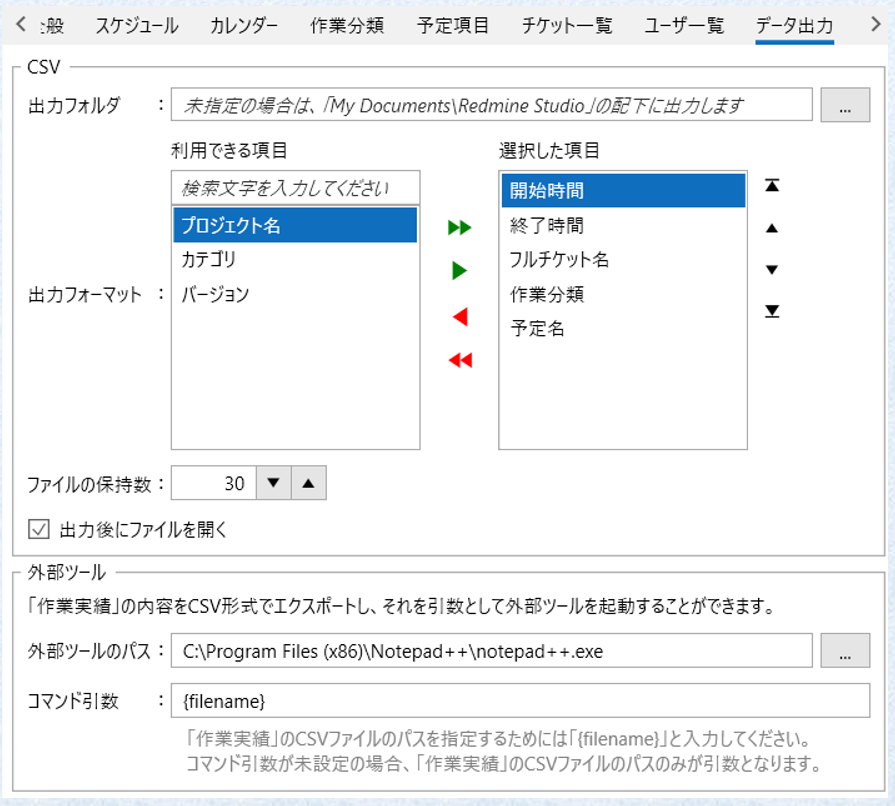
Configure settings related to the CSV output format.
Configure settings to launch an external tool with the output CSV file as an argument.
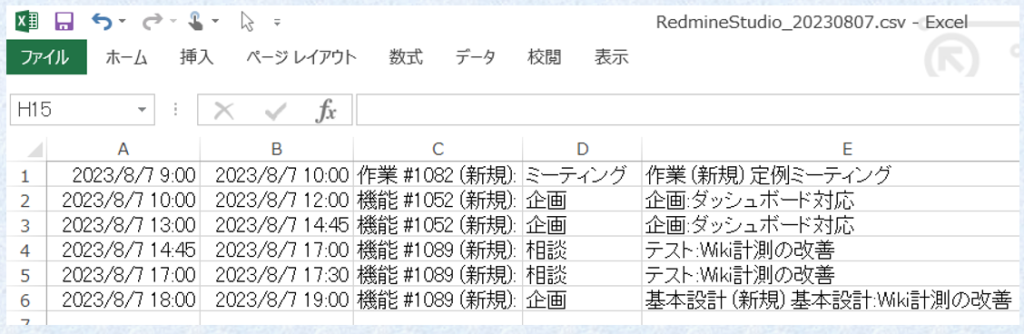
The CSV file in this case is saved in the temporary folder (%TEMP%) and deleted after processing is complete.
For example, configure the settings as follows:
”External Tool Path”: C:\Program Files (x86)\Notepad++\notepad++.exe
”Command Arguments”: {filename}
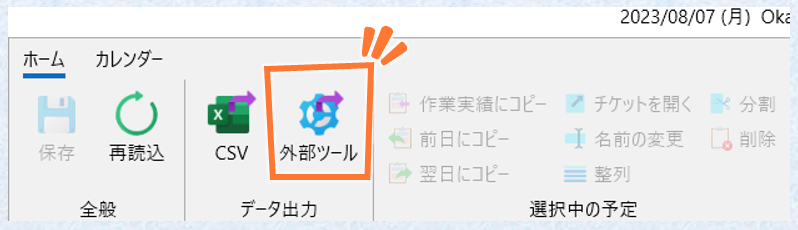
With this configuration, clicking “External Tool” on the input screen will launch Notepad++ with the output CSV path as an argument.
The above example simply opens the CSV file in a text editor, but if you set your company’s attendance management system as the external tool, you can integrate with the attendance management system just like registering work time in Redmine. Additionally, by using batch files, more flexible processing becomes possible.
Please make use of this feature.
This concludes the fourth part of the RedmineStudio settings guide.
For other settings, please see the following links: