RedmineStudio Time Entry Quick Start
redminepower
RedminePower

This is an explanation of RedmineStudio’s review issue creation feature.
This article covers how to set up trackers for review issues.
We explain everything from adding trackers in Redmine to configuring them in the app.
Please read through to the end.
Here’s how to add trackers in Redmine settings.
System administrator privileges are required to add them.
Open the tracker settings screen from the administration menu.
Click “New tracker” to open the tracker creation screen.
Set the name and click “Create” to add the tracker when finished.
Please note the following points for each item.
A workflow is a collection of settings that define which statuses an issue can transition to next. This setting can be configured per role or per tracker, so when you add a tracker, you need to configure it at the same time. If this configuration is not done correctly, you may encounter problems such as being unable to update issue status to certain values, so please be careful.
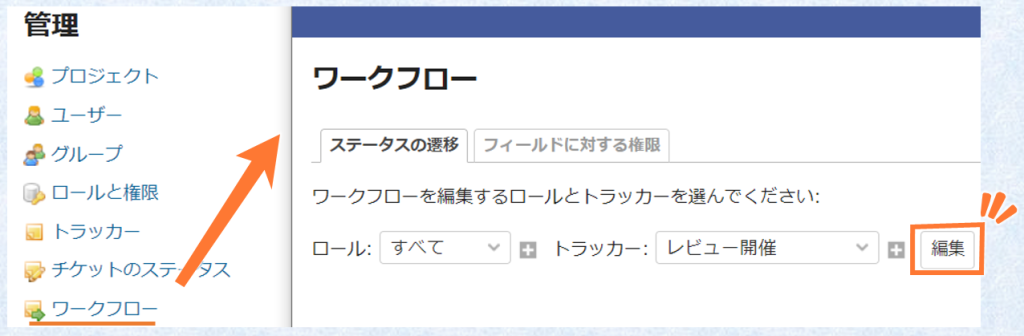
Open the workflow settings screen from the administration menu, select a role and tracker, and click Edit. If you’re not using role-based control, you can select “all” for the role. Select the tracker you just created.
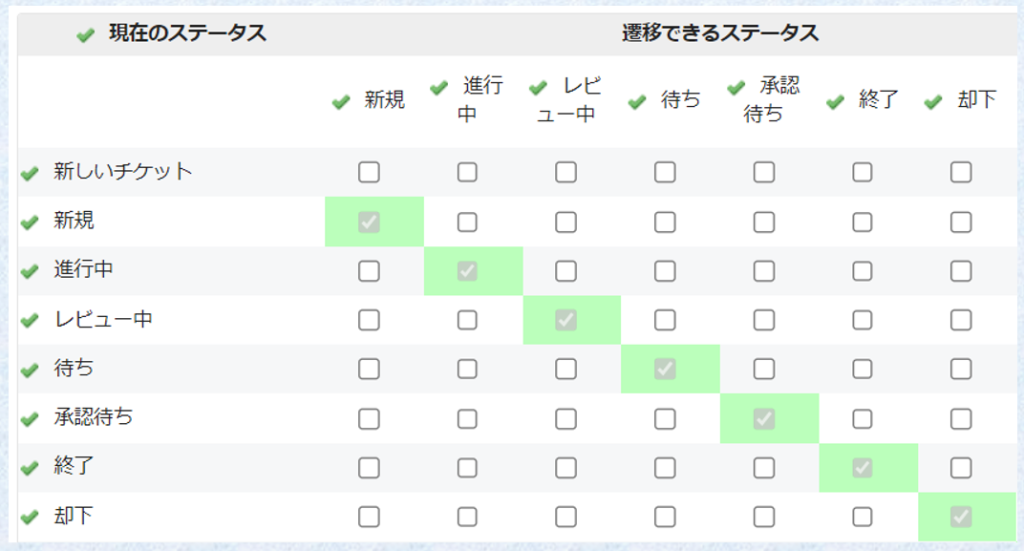
By default, no checkboxes are selected, meaning no status transitions are possible. Check the necessary boxes to enable the status transitions you need.
If you selected an existing tracker in “Copy workflow from” when adding the tracker, the workflow from that tracker will be automatically applied. Use this option if you don’t need to define a new workflow.
This completes the tracker addition.
If added correctly, the new tracker should appear in the “Trackers” section under “Issue tracking” in the project settings.
Here’s how to configure the trackers you added as review trackers in the app.
If you’re doing this immediately after adding trackers in Redmine, please restart the app first.
Open the review screen and click the “” at the bottom left.
Select the Review tab and configure the trackers you added for “Session Issue”, “Request Issue”, and “Finding Issue” respectively.
Configuration is now complete.
When you create issues in this state, they will be created with their respective trackers assigned as shown below.
This concludes the explanation of how to configure review trackers.
When working in an ‘Issue-Driven’ manner, properly assigning and managing issues is very important. The tracker configuration introduced here is the first step, so please give it a try.
See you in another article.