RedmineStudio Recording the Review Target Phase
redminepower
RedminePower


This is the second part of the RedmineStudio settings guide.
The settings guide is organized by tabs in the settings screen.
This article covers the following settings:
“Activity Categories” are the categories for “Time Entries” (= work hours) provided by Redmine. These “Activity Categories” must be set when registering “Time Entries” in Redmine.
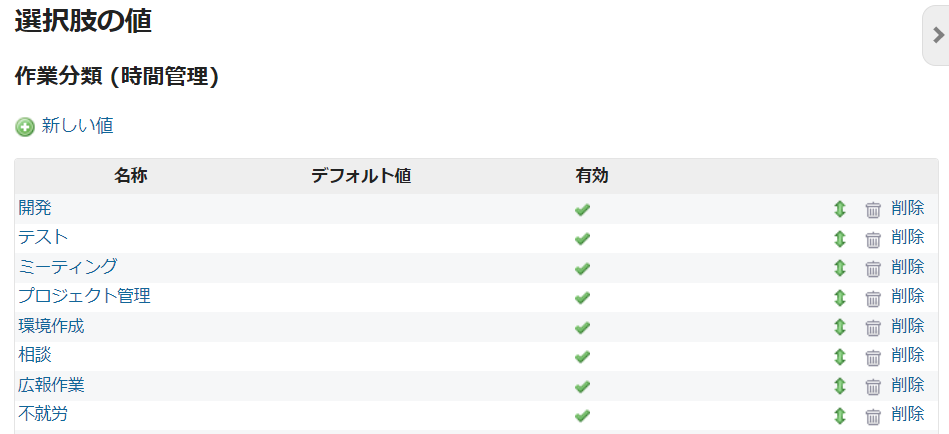
You can view the list of “Activity Categories” in Redmine under [Administration]-[Enumerations] in “Activities (time tracking)”. These can be freely added or edited according to your needs.
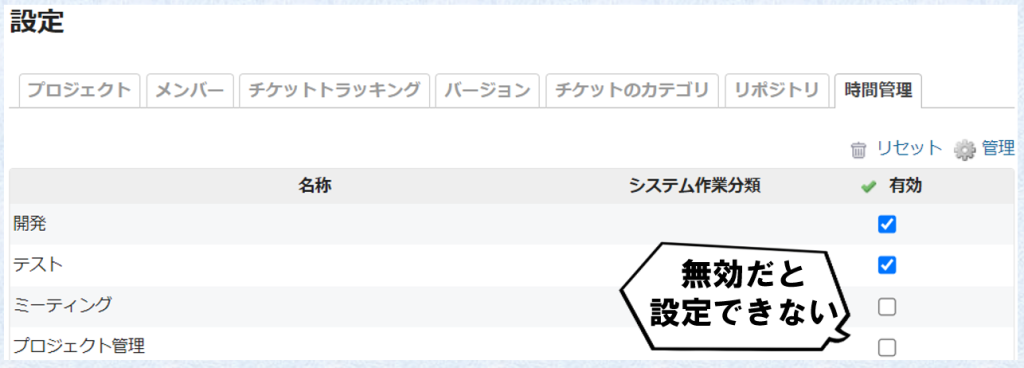
By enabling these “Activity Categories” in each project’s settings under [Time Tracking], they become available for setting on that project’s “Issues”.
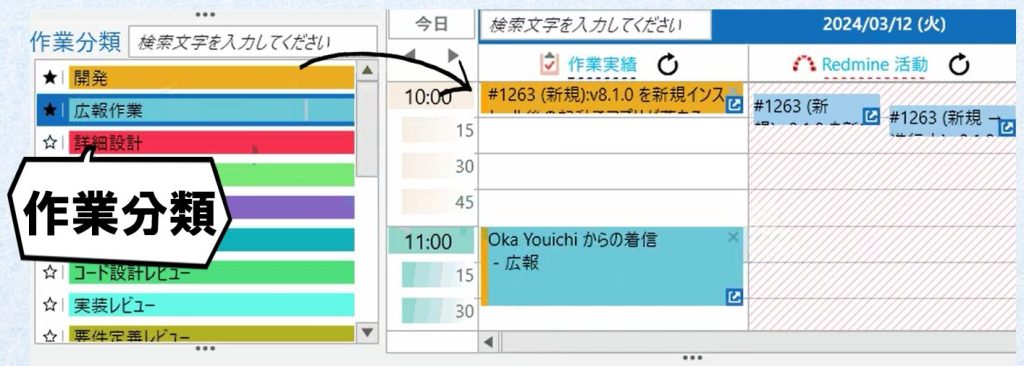
In RedmineStudio, the activity category list on the left side of the input screen displays the “Activity Categories” that can be set for the selected “Work Record”, allowing you to select and configure them from there.
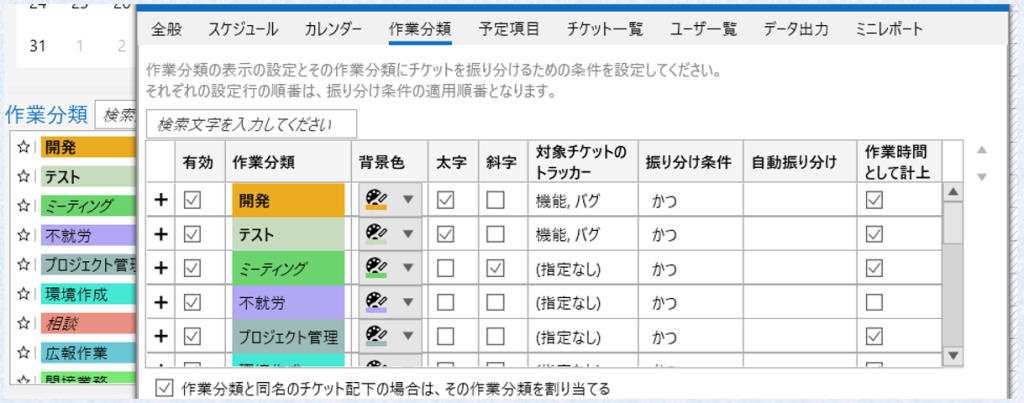
Configure the following settings for activity categories.
The activity category settings screen displays all enabled activity categories. However, you cannot add or edit “Activity Categories” from the settings screen. Please add or edit them from Redmine’s settings screen. The activity category column only displays names and cannot be edited.
By enabling this setting, the “Activity Category” will be automatically assigned to issues with the same name as the activity category, or to their child issues. For example, suppose you have an activity category called “Meeting”. If you create an issue called “Meeting” and create child issues “TL Regular Meeting” and “Morning Meeting” under it, then when you set “TL Regular Meeting” or “Morning Meeting” as a work record, the “Meeting” activity category will be automatically set.
Auto assignment for activity categories is a feature that automatically sets the “Activity Category” based on conditions derived from the “Issue” of the “Work Record”. By configuring this, the “Activity Category” will be automatically set when you assign an “Issue” to a “Work Record”, eliminating the need to manually select from the list.
Conditions can be set using combinations of the following issue elements:
For example, you can set conditions like:
In the settings screen, configure as follows:
Click the “+” on the left end of the setting row to display the condition list, then click the “+” on the right to add settings. In the capture below, two conditions are set for the “Development” activity category.
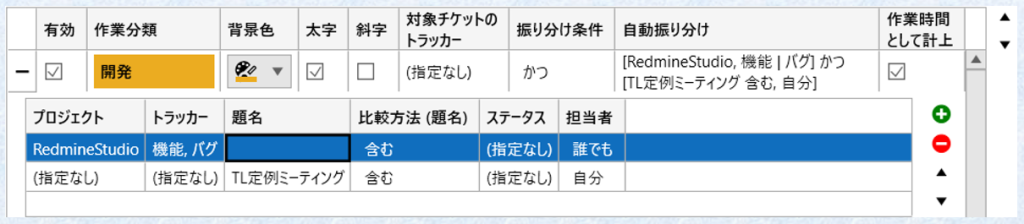
These conditions are combined according to the “Assignment Conditions” setting. Select from “AND” or “OR”. By default, it is set to “AND”, targeting issues that satisfy all conditions. When set to “OR”, issues that satisfy even one condition become targets.
Next, let’s discuss how conditions are applied based on issue hierarchy.
When applying conditions, if the target issue has a parent issue, the determination is made by tracing back through the hierarchy.
The condition check first targets the set issue. If it doesn’t match the conditions, it checks the parent issue. If that doesn’t match either, it checks that parent issue, and so on. Of course, if there is no parent issue, no backward tracing is performed.
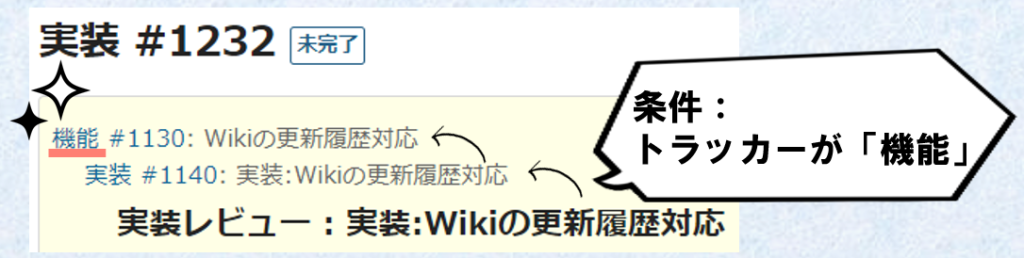
For example, if there is a condition “Tracker is Feature”, in the case below, the selected issue (#1232) has tracker “Implementation” so it doesn’t apply. However, tracing back through parent issues reveals an issue (#1130) with tracker “Feature”, so it is considered to match the condition.
Next, let’s discuss the order of activity category settings and the application order of auto assignment.
The auto assignment application order can be set by changing the order of activity category setting rows. The determination proceeds from the top of the settings screen in order, and when a match is found, that activity category is applied.
Also, while you can pin specific activity categories to the top in the input screen’s activity category list, this does not change the application order.
This concludes the second part of the RedmineStudio settings guide.
For other settings, please see the following links: