RedmineStudio Review Issue Creation Quick Start
redminepower
RedminePower

>> RedmineStudio Settings② -Activity Categories-
This is the first part of the RedmineStudio settings guide.
The settings guide is organized by tabs in the settings screen.
This article covers the following settings:
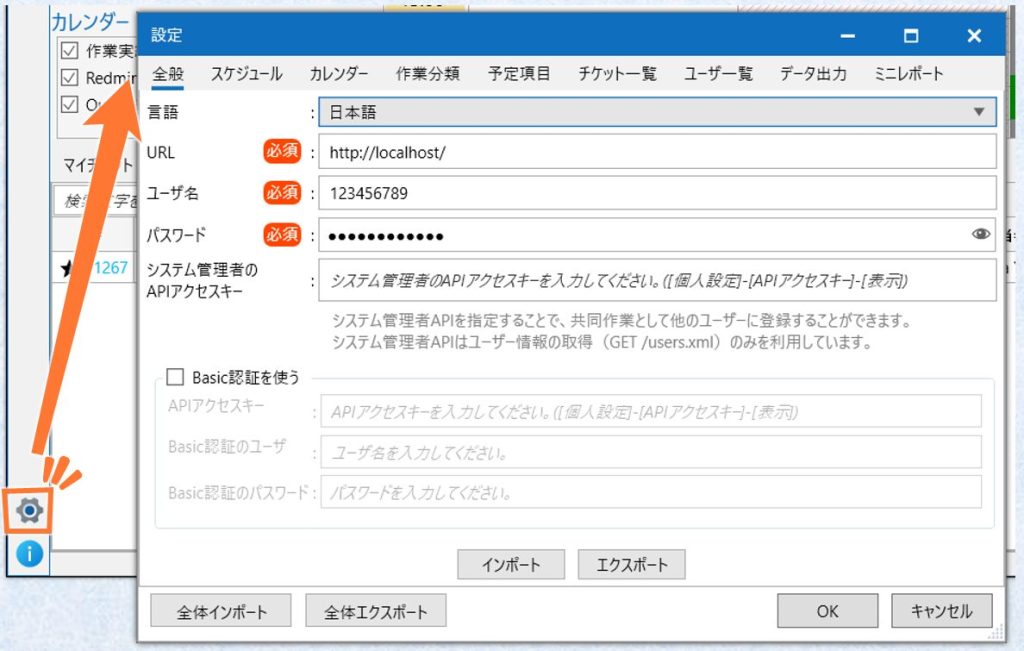
Click the “” button at the bottom left of the screen to open the settings dialog.
When you have finished configuring the settings, click the “OK” button.
Some settings may require restarting the application.
You can load settings from an external JSON file.
Only files that were output using the “Export” function described below can be imported.
RedmineStudio provides two types of import: individual “Import” for each settings tab, and “Full Import” which imports all settings at once. Each tab’s individual “Import” button only imports settings for that tab. The “Full Import” button at the bottom left of the settings screen imports all tab settings at once.
“Full Import” can be performed from any tab, but individual “Import” must be performed while the corresponding tab is open, selecting the corresponding file.
You can save settings as an external JSON file.
Similar to “Import”, there are two types: individual “Export” for each settings tab, and “Full Export” which exports all settings at once. Each tab’s individual “Export” button only exports settings for that tab. “Full Export” exports all tab settings at once.
Using this “Import” and “Export” functionality, you can share settings within your team and deploy them quickly. Please note that some settings such as passwords are excluded from import and export.
Important settings are marked with “*”.
Configure the “Language” and the three settings: “URL”, “Username”, and “Password”.
These settings are required.
“Username” and “Password” are excluded from import and export.
Set the API access key of a user with system administrator privileges. If your account does not have the privileges, enter the API access key of someone who does.

Configure this setting as needed. It is mainly used to retrieve user information and is required if you want to check other people’s time entry status on the input screen.
“System Administrator’s API Access Key” is excluded from import and export.
If the server running Redmine uses Basic authentication, check this option and configure the settings. This setting is not needed if Basic authentication is not used.
These settings are excluded from import and export.
Configure time-related settings for the day, such as start time and time period classifications.
Set the unit for entering work time, ranging from 5 to 30 minutes.
Set the “Day Start Time” and “Work Start Time”.
“Day Start Time” is when the date changes. “Work Start Time” is the start of the display range. By default, these are set to 5:00 and 9:00 respectively.
Set whether to use the flex time system.
When enabled, you can configure core time settings in the time settings below. This allows overtime calculations to reflect the flex time system.
Configure the following settings for each time period.
You can add or remove setting rows using the “+” and “-” buttons on the right.

Configure weekly and yearly holiday settings.
Set whether each day of the week is a working day.
Work time entered on days not set as working days is treated as overtime, regardless of the “Time Settings” in the schedule configuration.
Select dates for which you want to configure special working day settings.
If a date defined as a working day in “Working Days” is selected, that day is treated as a special holiday. Conversely, if a day defined as a holiday is selected, that day is treated as a special working day.
Use this setting to reflect public holidays, company-specific holidays, or special working days due to factory schedules.
These features reference the subject or category of events registered in Outlook and treat time periods with those events as non-working hours (= leave). By default, these are disabled, so check the box to enable them.
When enabled, the system checks for events with the specified subject or category name, and if found, treats that time period as non-working hours. This feature is designed to detect personal leave from your calendar and reflect it in various processes.
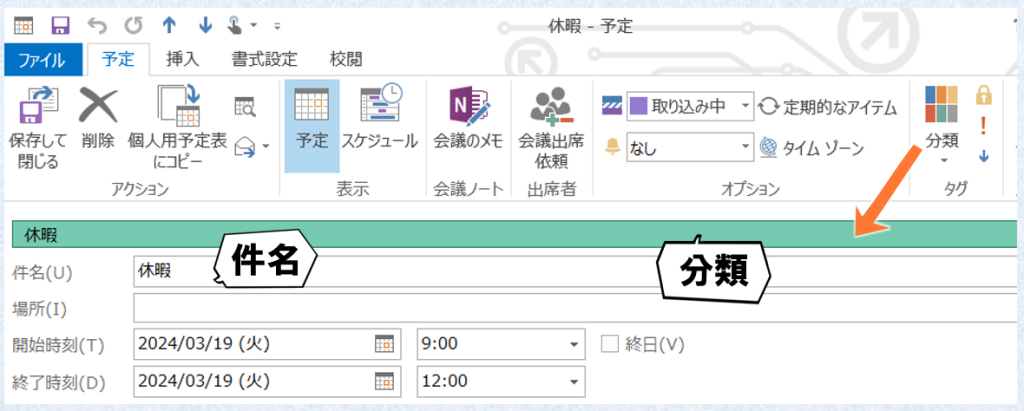
For example, if “Subject Format” in “Set Events with Specific Subject as Leave” is set to “Leave”, and there is an event named “Leave” from 9:00-12:00 on 3/19, then 3/19 9:00-12:00 is processed as non-working hours (= leave). This would be a half-day morning leave. For a full day leave, adjust the “Leave” event to span 9:00-17:30.
Categories can be configured similarly, setting time periods with those events as non-working hours. For categories, the category name is used for the determination.
Both “Subject Format” and “Category Name Format” support regular expressions. For example, setting “Subject Format” to “Leave|Comp Day” will target events with subjects containing either “Leave” or “Comp Day”.
This concludes the first part of the RedmineStudio settings guide.
For other settings, please see the following links: