
redmine_date_independent Plugin Guide
redminepower
RedminePower

This is an explanation of the Redmine plugin “redmine_reply_button”.
This plugin adds a “Reply” button that allows you to start editing with the last updater set as the assignee. This should make communication within issues much easier!

Download it from here.
In the following sections, we will briefly review “communication within issues,” which is one of the characteristics of issue-driven development, and then explain the specific plugin configuration methods.
Please read through to the end.
One of the characteristics of issue-driven development is “communicating within issues.”
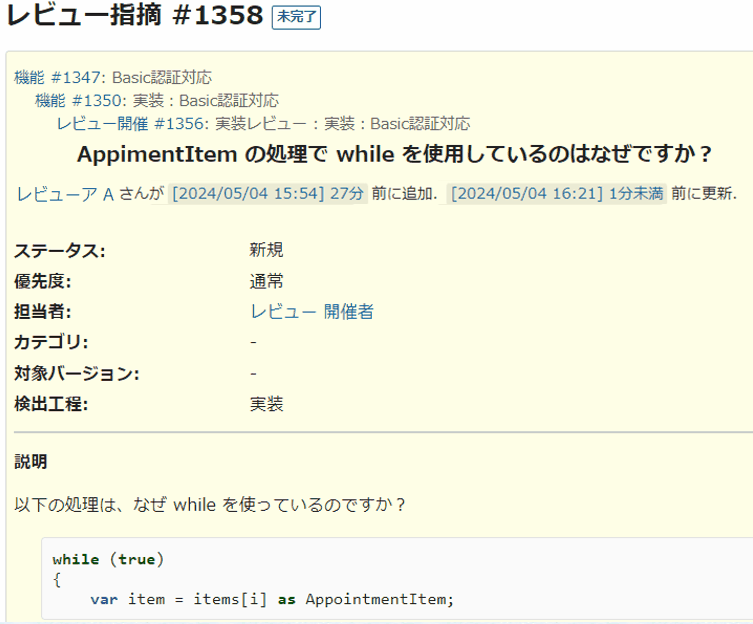
For example, suppose the following exchange took place during a code review.

Why is while being used in the following process?
while (true)
{
    var item = items[i] as AppointmentItem;
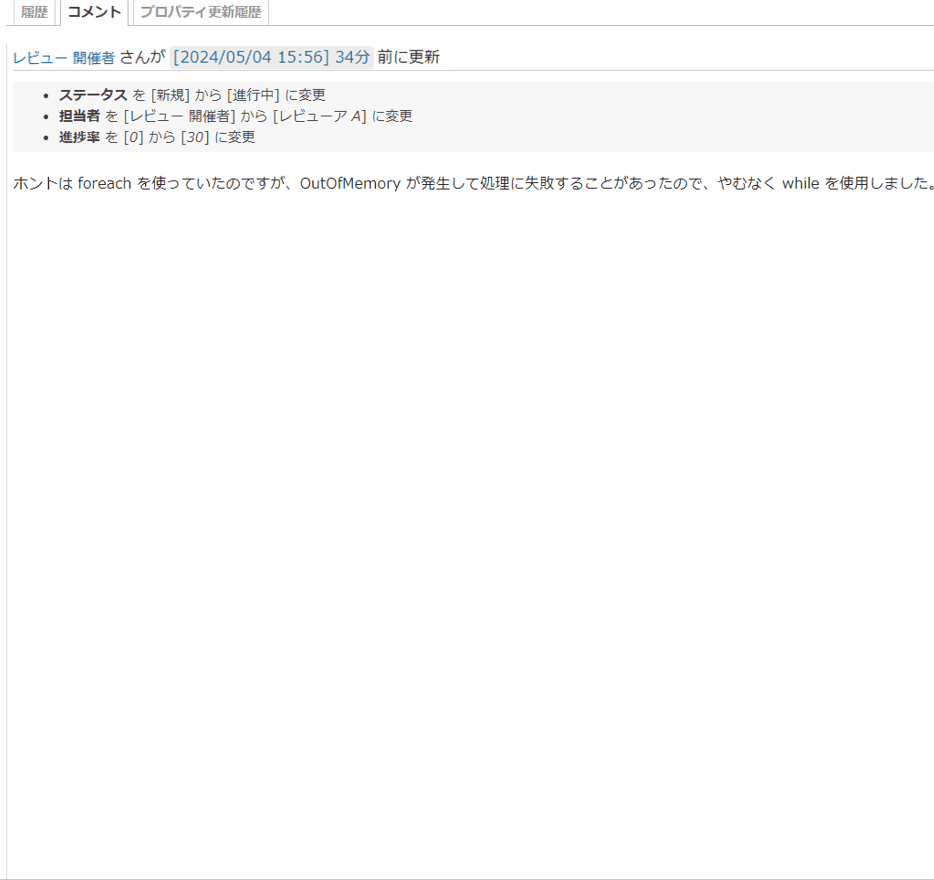
Originally I was using foreach, but OutOfMemory errors were occurring and causing the process to fail, so I reluctantly switched to while.
I see, understood.
Could you add a comment in the code explaining this?

Understood.
I’ve added the following comment, please verify.

Verified.
Thank you for addressing this.
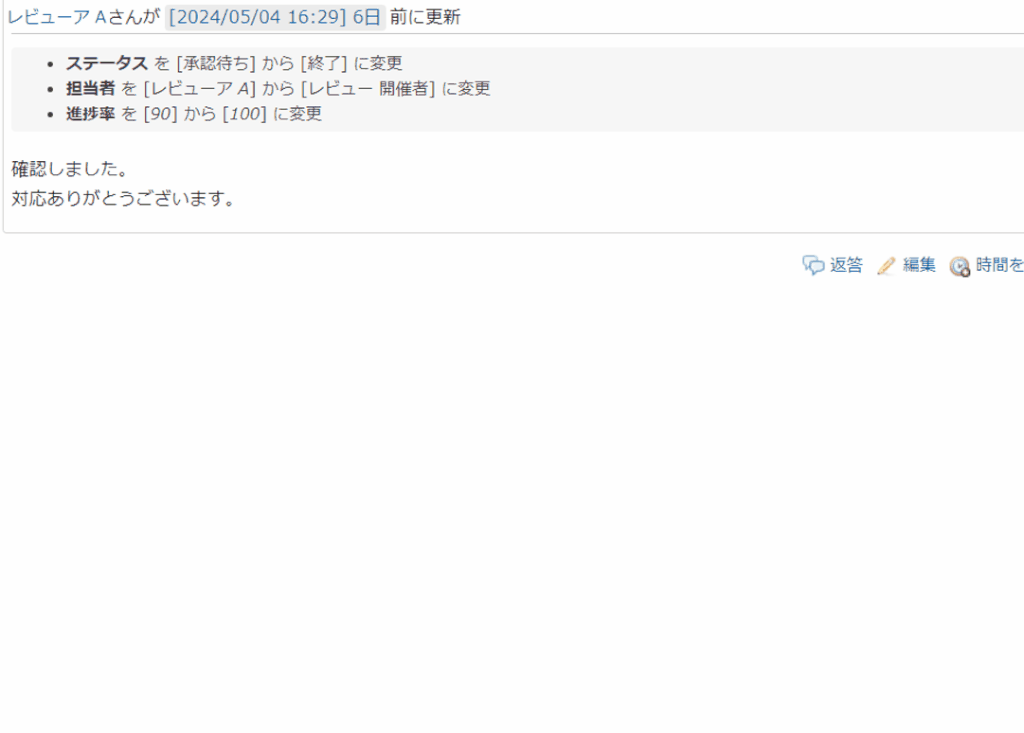
In issue-driven development, instead of conducting such exchanges via email or chat, we do it within issues while switching assignees as shown below.
The initial comment is created as a review issue like this. After that, the exchange continues while switching assignees as shown below. (For more about ‘issue-driven’ review work using communication within issues, please see here.)
Conducting exchanges within issues while switching assignees offers the following benefits.
While “communicating within issues” offers great benefits, there is also some complexity. Specifically, when replying to someone, you have to set them as the issue assignee each time. This might not be a big deal for small projects, but in large projects with dozens of members, selecting the right person from the list every time can be quite tedious.

This is where “redmine_reply_button” comes in.
With this plugin, a “Reply” button is added that lets you start editing with the assignee already changed to the other party. This eliminates the need to select from the list, reducing the effort required.
Let’s look at the specific configuration method below.
Place redmine_reply_button in your Redmine plugins folder and restart Redmine. You can do this with the following commands.
$ cd /var/lib/redmine/plugins
$ git clone https://github.com/RedminePower/redmine_reply_button.git
$ httpd -k restart
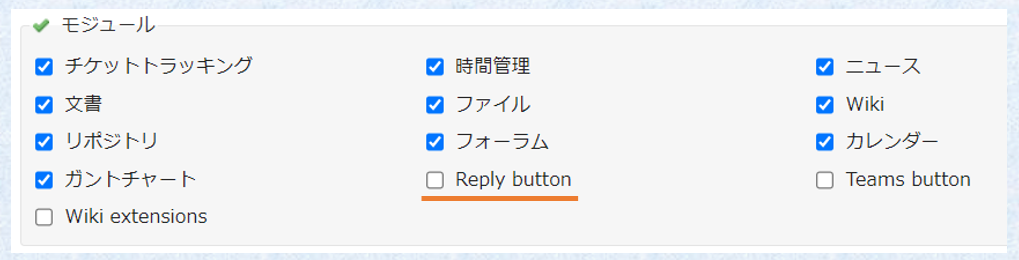
Once the installation is successful, a “Reply button” checkbox will appear under [Project]-[Modules] in the project settings screen. Check this box if you want to enable the “Reply” button.
This will display the “Reply” button on the issue page. When you start editing a issue from the “Reply” button, editing begins with the “last updater” already set as the “assignee.”
This concludes the explanation of the “redmine_reply_button” plugin.
What did you think?
It might be hard to visualize just from words, so since the installation process is simple, please give it a try.
We also have an explanation of ‘issue-driven’ review work using Redmine Studio, which is based on this “communication within issues” approach. With Redmine Studio, creating review issues becomes very easy, so please give it a try!